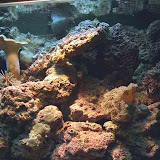
CYCLE THE TANK WITH LIVE ROCK ONLY
Step 1. Purchase all (or if your budget is low at the time, get at least 1/2) of the live rock you will use in your reef aquarium, and proceed to step 2. When ready, get the second 1/2 of the rock.
Step 2. When all the live rock is in the tank, test for ammonia and nitrite. You need to get a zero reading, which could take 2 to 6 weeks, depending on the amount of die-off on the rock. Do not proceed to step 3 until steps 1 and 2 are complete.
Step 3. Begin to add inverts (clams, shrimp, starfish, crabs, snails) . Add a few at a time, checking ammonia and nitrite. After all inverts are added to the reef aquarium, and the test results for ammonia and nitrite are zero, proceed to add your corals, a few at a time. Continue to test for ammonia and nitrite until all your corals are added. When the readings are at zero (this will usually take about 2 weeks, possibly longer), proceed to add the fish in the same manner as above, until all the fish have been added to the reef tank.
Cycling the reef tank with live rock is the simplest, most trouble-free way to start a reef tank.
Step 4. When the test in the aquarium results read zero, and you begin to test and record nitrate, your tank is completely cycled. When you cycle this way, the live rock does most of the conditioning. This is the way to start your system. It is definitely the safest procedure, because it is hard to know how much die-off the live rock has on it. This way you won’t endanger the valuable, delicate specimens you will add later. Remember, only bad things happen fast. You will need to exercise patience, resisting the impulse to do things in reverse. Remember: live rock first, inverts second, corals third, and fish last. You are now up and running. This will take about 2 to 6 weeks, possibly longer.
Once all the rock is in the tank, the cycling of the water in the reef aquarium will begin. In approximately three days, there should be a measurable amount of ammonia. Test and record the ammonia at this time. Continue to test and record it at three to four-day intervals. The reading will rise and rise, until one day it will drop off and be zero. At that time, begin to test for nitrite.
The nitrite cycle is very similar to the ammonia cycle, so use the same procedure as described for ammonia. Do not become alarmed with the test results! This is the cycling process, and the tank will balance out! As long as you do not have any fish, inverts or coral in the tank, you have nothing to worry about. Be patient, let nature take its course, and the tank will cycle.
When the nitrite test reads zero, you should begin to test for nitrate. You will get only very faint nitrate readings, because the tank is now balanced and has virtually no bio-load (waste products from fish, invertebrates, etc.).
When the bacteria “catch up” (multiply to process the waste in the tank), you will get zero readings of ammonia and nitrite The reef tank has now had its first and largest cycle. When you add more livestock, this will increase the waste load, and the bacteria will have to multiply and catch up with the increased load. You will get mini-cycles of ammonia and nitrite when you add livestock. These small cycles will be insignificant as long as you don’t add too many creatures at once. Begin by adding inverts, two to three at a time, until they are all in. Do the same with the corals (possibly slower because of the cost). Test for ammonia and nitrite a few days after each addition. If the test results are zero, proceed to add creatures as described until all inverts and corals are added. Give them a week or so to acclimate. Test for ammonia and nitrite. When they register zero, and the inverts and corals appear to be well adjusted, you are ready to add fish in the same manner as described.
Simplified Reefkeeping